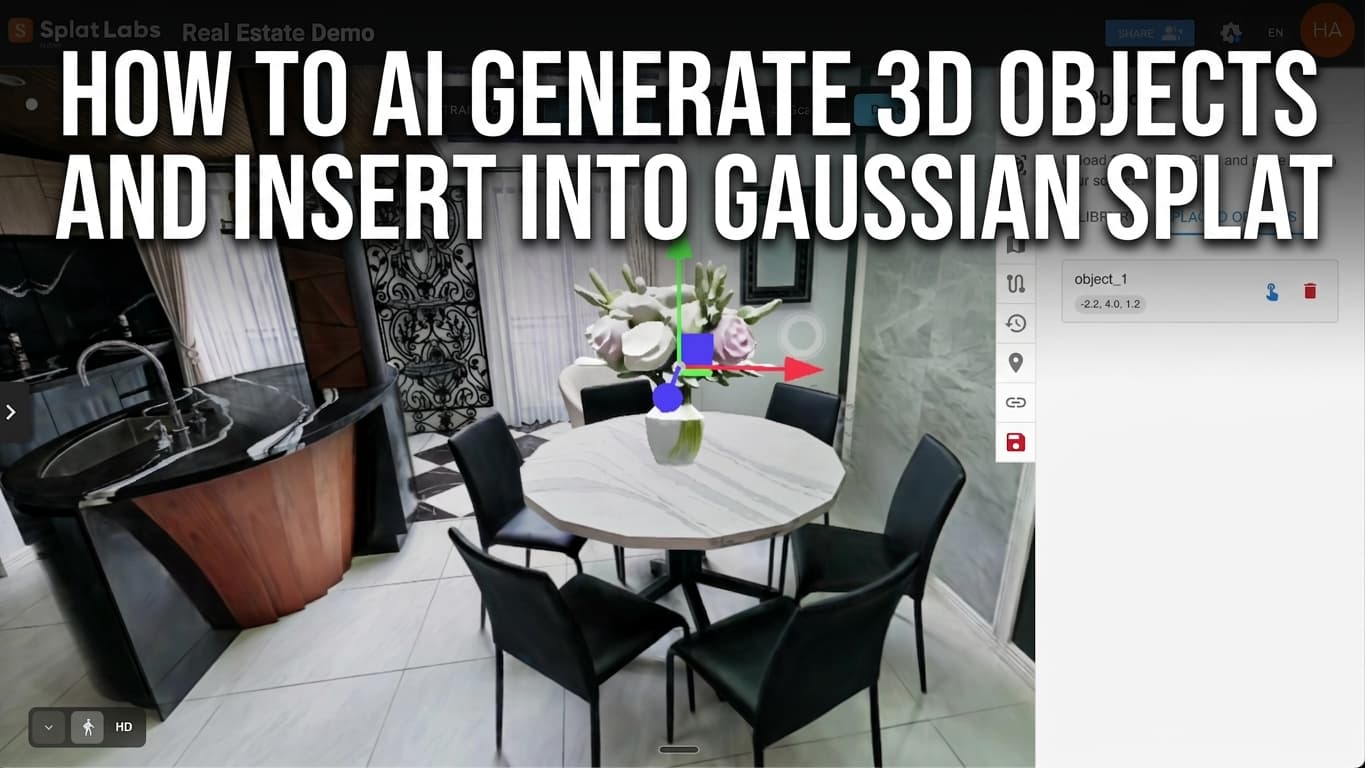
3D Objects en Splat Labs Cloud te permite subir archivos GLB (hasta 50 MB cada uno), colocarlos dentro de tu escena de Gaussian Splat y ajustarlos con trasladar, rotar y escalar — luego Guardar para que se carguen con el proyecto. Esto desbloquea accesorios reales: muebles, decoración, accesorios o cualquier cosa que ya tengas como GLB.
Esta guía recorre un flujo de trabajo avanzado pero práctico: usa el generador de imágenes con IA integrado para renderizar una versión ambientada de tu espacio, aísla un objeto con Meta Segment Anything Model (SAM) y herramientas de generación 3D, exporta un GLB y tráelo de vuelta a Splat Labs. Puedes omitir el paso de IA por completo si ya tienes un GLB de cualquier pipeline — Blender, bibliotecas de assets u otras herramientas generativas 3D — siempre que el archivo cumpla el límite de tamaño.
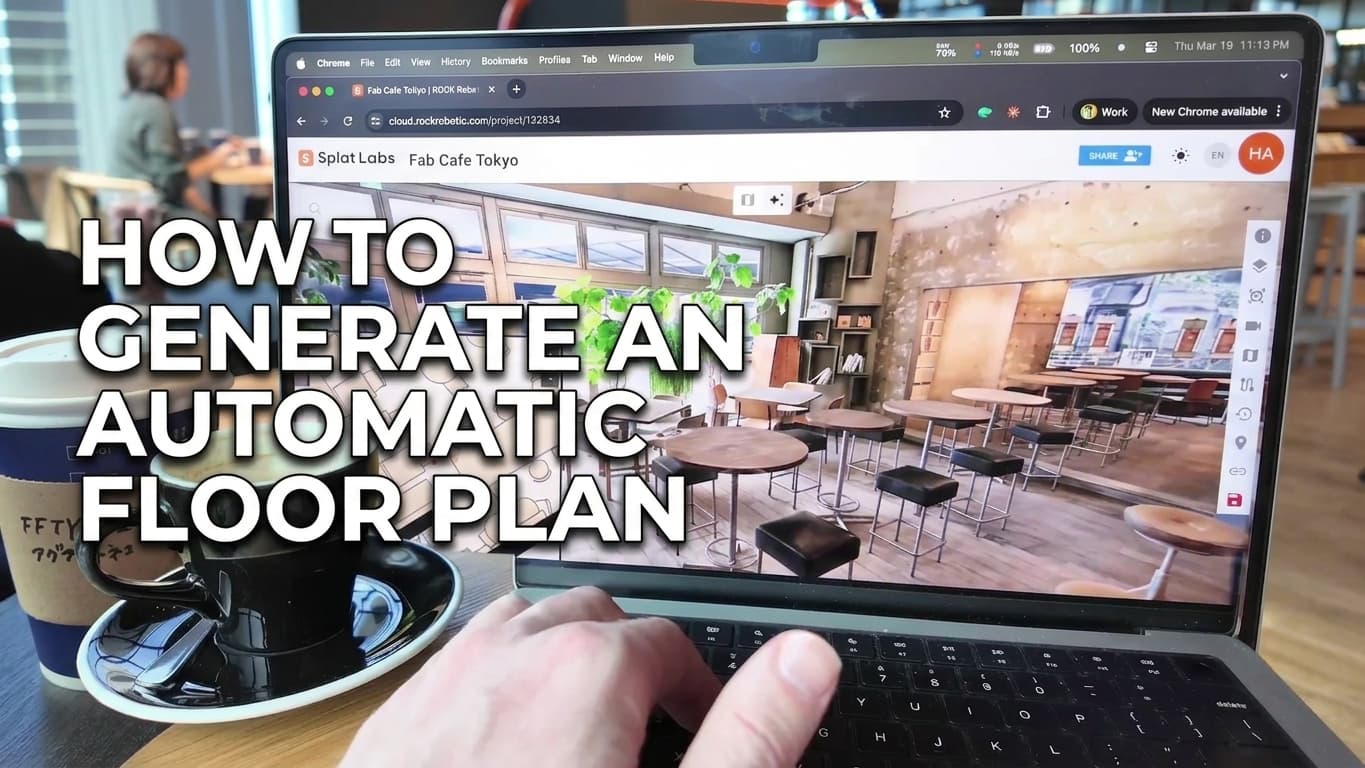
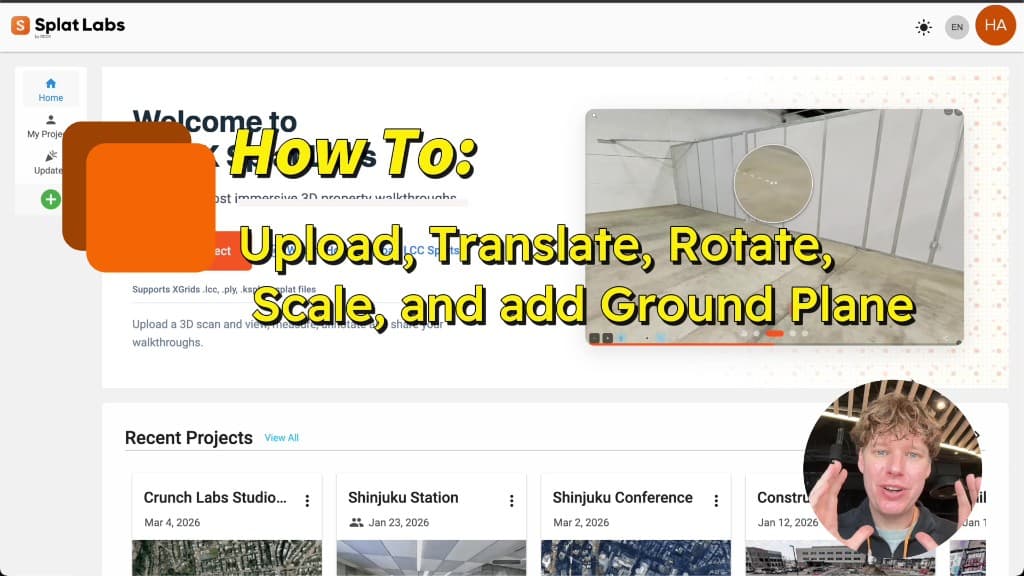
Los pasos de Meta se ejecutan en las propias herramientas de Meta (terceros); Splat Labs aloja tu splat y tus objetos colocados. Para contexto sobre diseños impulsados por IA dentro de un escaneo, consulta AI 3D Redesign: Transforma Cualquier Espacio Con un Prompt de Texto. Para conceptos básicos de orientación de splats, consulta Cómo Subir, Trasladar, Rotar, Escalar y Añadir un Plano de Suelo.
Mira el tutorial completo
De principio a fin: AI staging en Splat Labs → exportación de imagen → Meta SAM / malla 3D → GLB → panel 3D Objects → colocar, escalar, guardar y explorar.
Lo que necesitarás
- Una cuenta de Splat Labs Cloud y un proyecto con un Gaussian Splat ya cargado (por ejemplo un recorrido inmobiliario o cualquier espacio capturado).
- Para el segmento opcional de AI staging: acceso al generador de imágenes con IA (icono de destello) en el visor — la misma familia de capacidades que nuestros flujos de rediseño de escenas con IA.
- Para el segmento de malla: una cuenta de Meta y su experiencia de Segment Anything con exportación de objeto 3D / GLB (los nombres de la interfaz cambian con el tiempo; busca enmascaramiento más Generate 3D o equivalente).
- Un archivo GLB menor a 50 MB para importar (ya sea que lo hayas generado con Meta o de otra fuente).
Paso 1: Abre el generador de imágenes con IA
En la barra de herramientas inferior izquierda del visor, abre el menú y elige el icono de destello — el generador de imágenes con IA. Verás un prompt como Describe how you'd like this space staged, con espacio para añadir muebles, iluminación y ambiente.
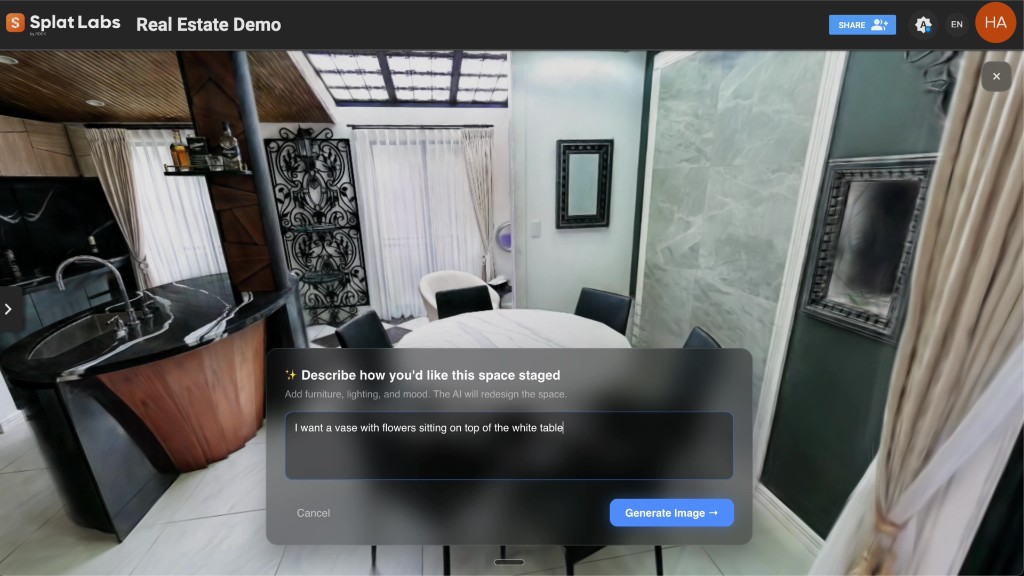 Prompt de ejemplo: añade un jarrón con flores sobre la mesa blanca — alineado con los flujos de virtual staging.
Paso 2: Genera y compara (opcional pero se muestra aquí)
Ingresa un prompt claro. En la demo usamos: Quiero un jarrón con flores encima de la mesa blanca. Ejecuta la generación, luego usa tu vista de antes / después o comparación si está disponible para confirmar que solo cambió la región que te importa.
 Lado original de la comparación — mesa vacía, misma geometría de la habitación.
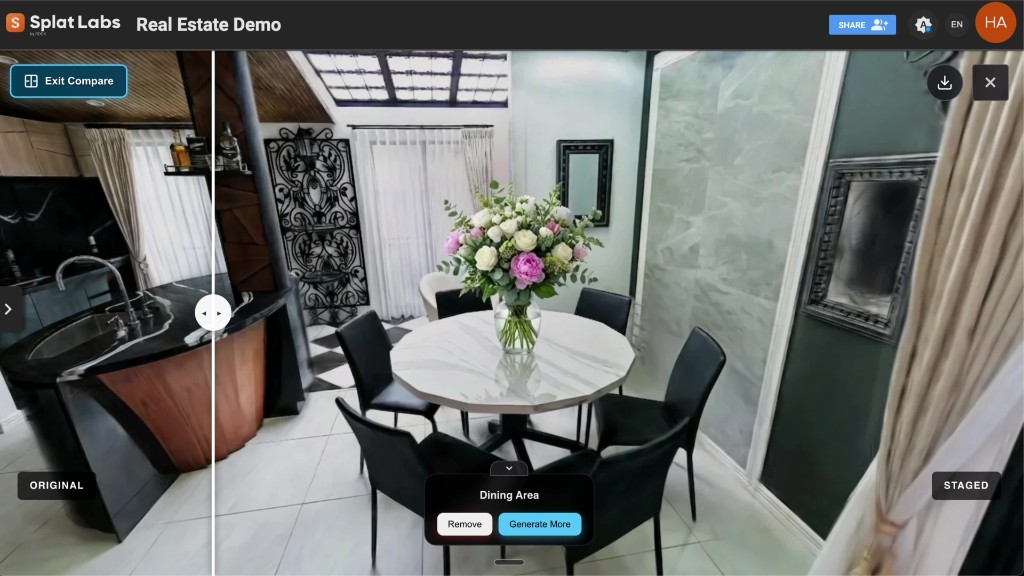 Lado ambientado — la imagen generativa con IA coincide con la escena y añade el objeto que describiste.
Guarda la imagen ambientada en tu computadora. Usarás esta imagen como entrada para la segmentación y 3D en la herramienta de Meta.
Paso 3: Segmenta el objeto y exporta GLB en el flujo de Meta SAM 3D
Abre la experiencia de Segment Anything / SAM de Meta que soporta exportación de malla 3D (a menudo se muestra como seleccionar regiones en la imagen y Generate 3D). Sube la imagen ambientada, coloca puntos positivos sobre el objeto que deseas (por ejemplo el jarrón y las flores), refina la máscara con añadir/quitar si es necesario, luego genera la malla y descarga como GLB.
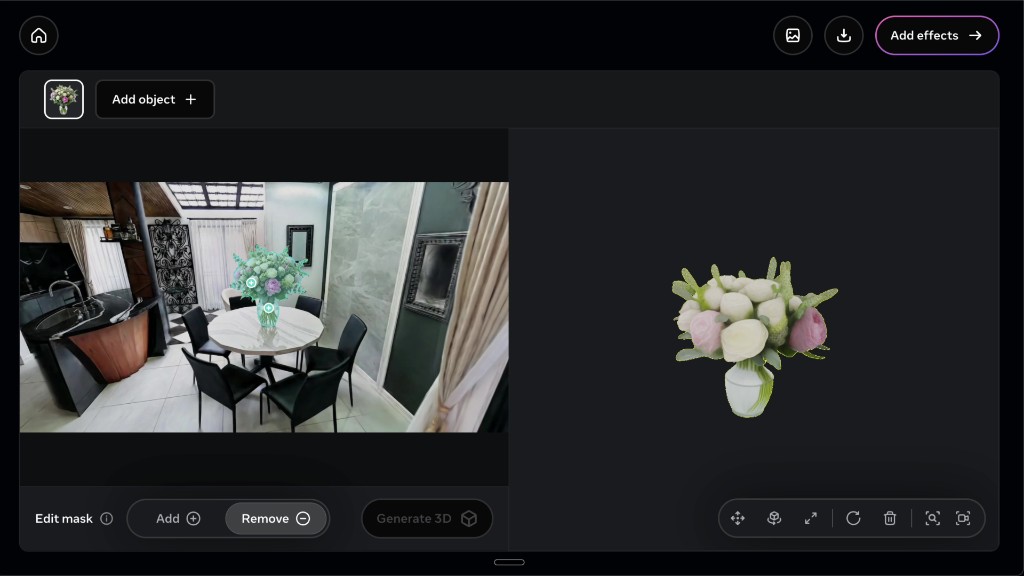 Enmascaramiento estilo Segment Anything más una vista previa 3D — exporta el resultado como GLB para Splat Labs.
Este paso no está alojado por Splat Labs; es un puente desde el staging generativo 2D hasta un asset 3D portátil.
Paso 4: Importa el GLB en Splat Labs (3D Objects)
De vuelta en tu proyecto de Splat Labs, abre la barra de herramientas derecha y selecciona 3D Objects. Usa Upload para añadir el GLB que descargaste. El archivo aparece en tu biblioteca; colócalo en la escena para que se convierta en un objeto colocado que puedes seleccionar.
Paso 5: Trasladar, rotar y escalar para que coincida con la habitación
Con el objeto seleccionado, usa Transform: Translate, Rotate y Scale para que el asset se asiente sobre la mesa (o cualquier superficie) y coincida con la escala del mundo real. La demo usa flechas de ejes para una colocación precisa — el mismo modelo mental que trasladar / rotar / escalar de splats en nuestro tutorial de plano de suelo, aplicado a la malla importada.
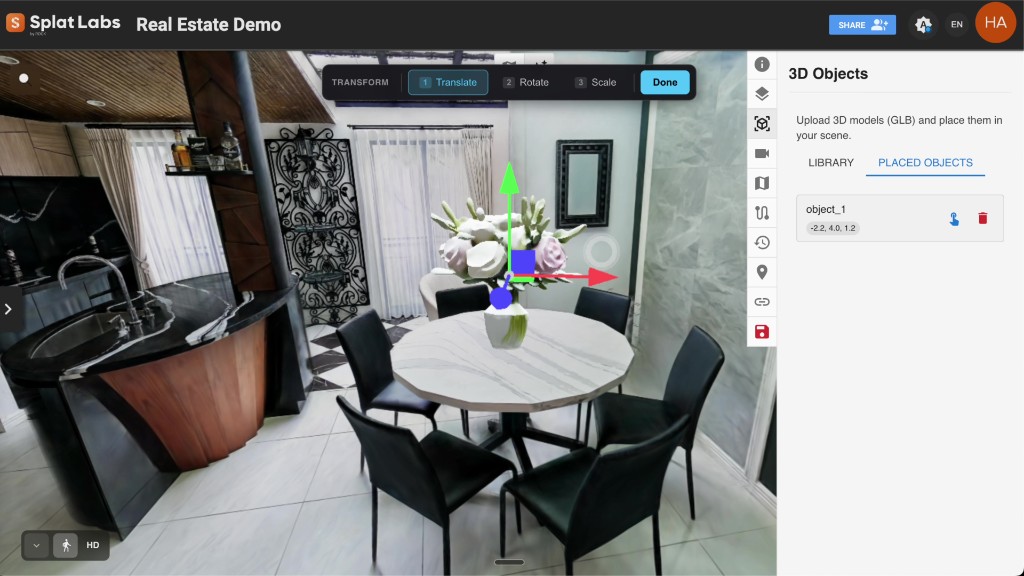 3D Objects → GLB colocado → Transform hasta que el accesorio se alinee con la geometría de tu Gaussian Splat.
Haz clic en Save en la barra de herramientas para que el objeto persista con el proyecto.
Paso 6: Recorre la escena
Muévete por el espacio normalmente. El GLB es geometría 3D real en el visor — puedes orbitar, caminar y verlo desde múltiples ángulos, no solo una superposición plana. Mesas, sillas, puertas o decoración — todo funciona igual siempre que sean GLBs válidos dentro del límite.
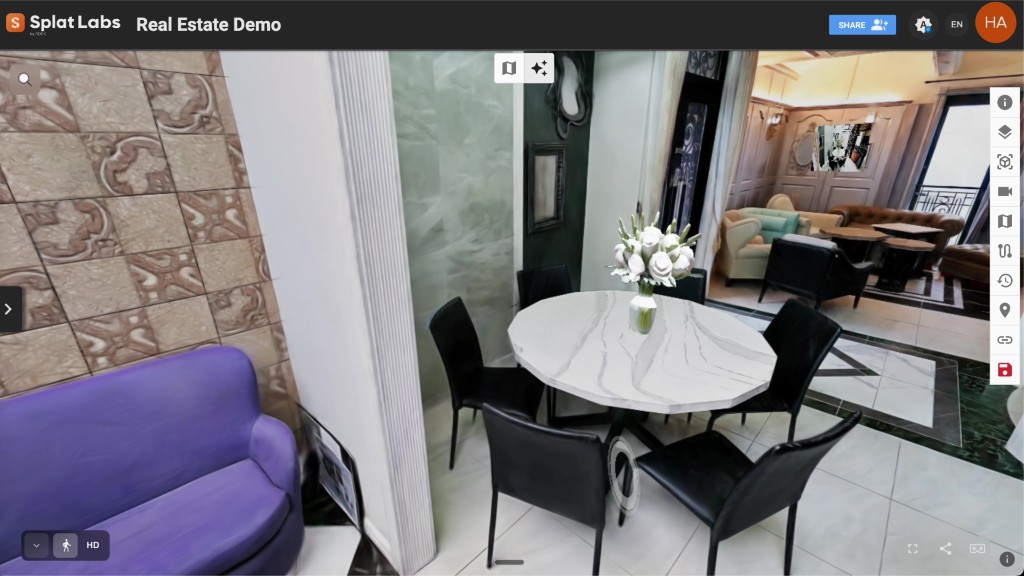 Escena terminada: IA generativa para la imagen de referencia, extracción 3D estilo SAM, Splat Labs para colocación y compartir.
Consejos
- No necesitas usar AI staging. Si ya tienes un GLB, ve directo a 3D Objects → subir → transformar → guardar.
- Mantén los prompts específicos sobre ubicación y tipo de objeto para que la imagen que exportes coincida con la geometría de tu splat.
- La calidad de la malla depende del paso 3D externo; ajusta la segmentación y regeneración en la interfaz de Meta antes de reimportar.
- Comparte el proyecto desde Splat Labs cuando los interesados deban revisar la escena amueblada — basado en navegador, sin instalar app.
Próximos pasos
- Explora los precios para equipos que necesitan más proyectos, colaboración y funciones con IA.
- Lee AI 3D Redesign: Transforma Cualquier Espacio Con un Prompt de Texto para más sobre IA generativa dentro de Gaussian Splats.
- Consulta ideas de recorridos virtuales e inmobiliaria para flujos de trabajo de listados.
¿Preguntas sobre implementación empresarial o captura con hardware? Contáctanos — estaremos encantados de ayudar.