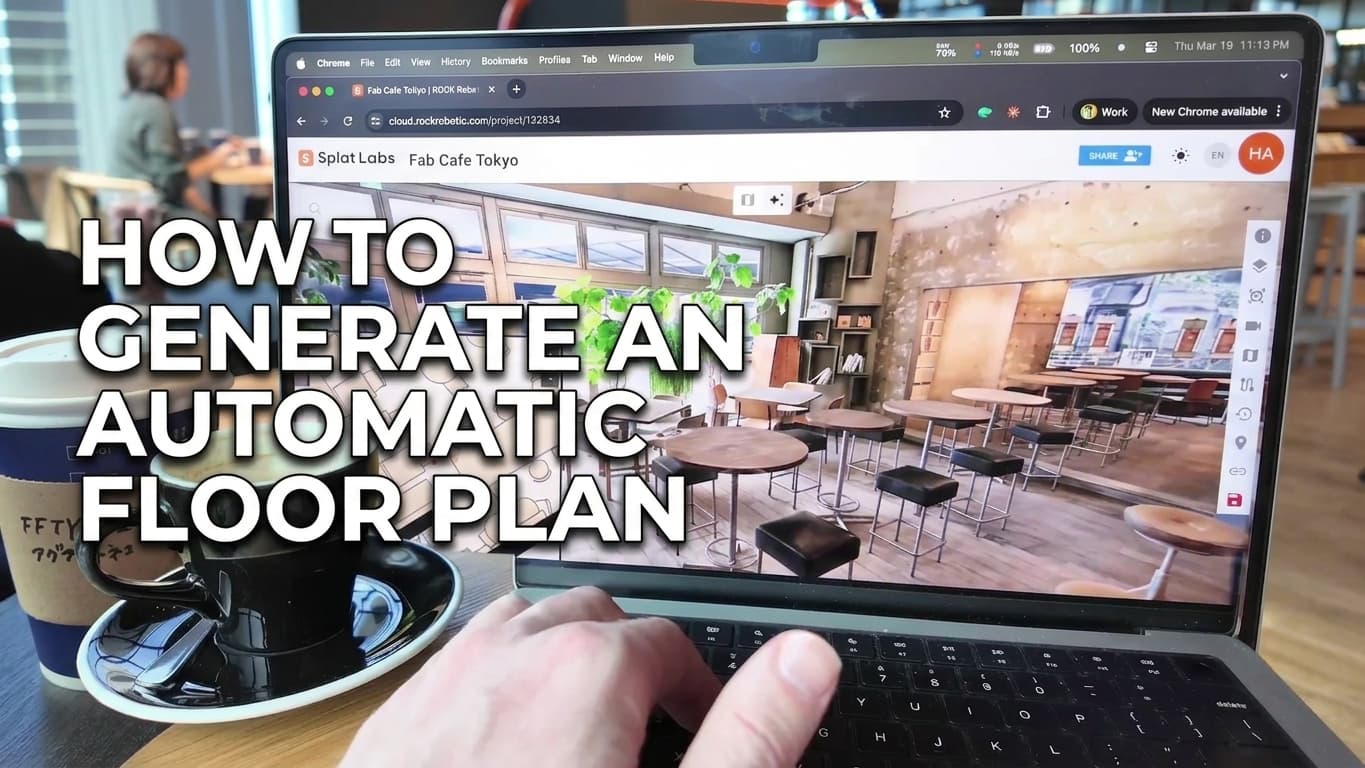
Over Time (also called 4D timelines in our docs) lets you link multiple Gaussian splats of the same place captured on different dates, then flip between them while staying at the same viewpoint—so you can see framing go up, slabs pour, or interiors transform without hunting through disconnected files. This walkthrough matches the video below; for written reference detail, see 4D Timelines and the live example on our Construction progress dataset article.
Watch the full tutorial
Full workflow: organize projects, open Over Time, add linked splats, calibrate, then scrub the timeline from the viewer.
What you will need
- A Splat Labs Cloud account with access to Over Time / 4D timelines (available on Starter, Business, and Enterprise—see 4D Timelines)
- Two or more projects (or splats) that cover the same site from different time periods, each processed in Splat Labs
Step 1: Group your captures (optional but practical)
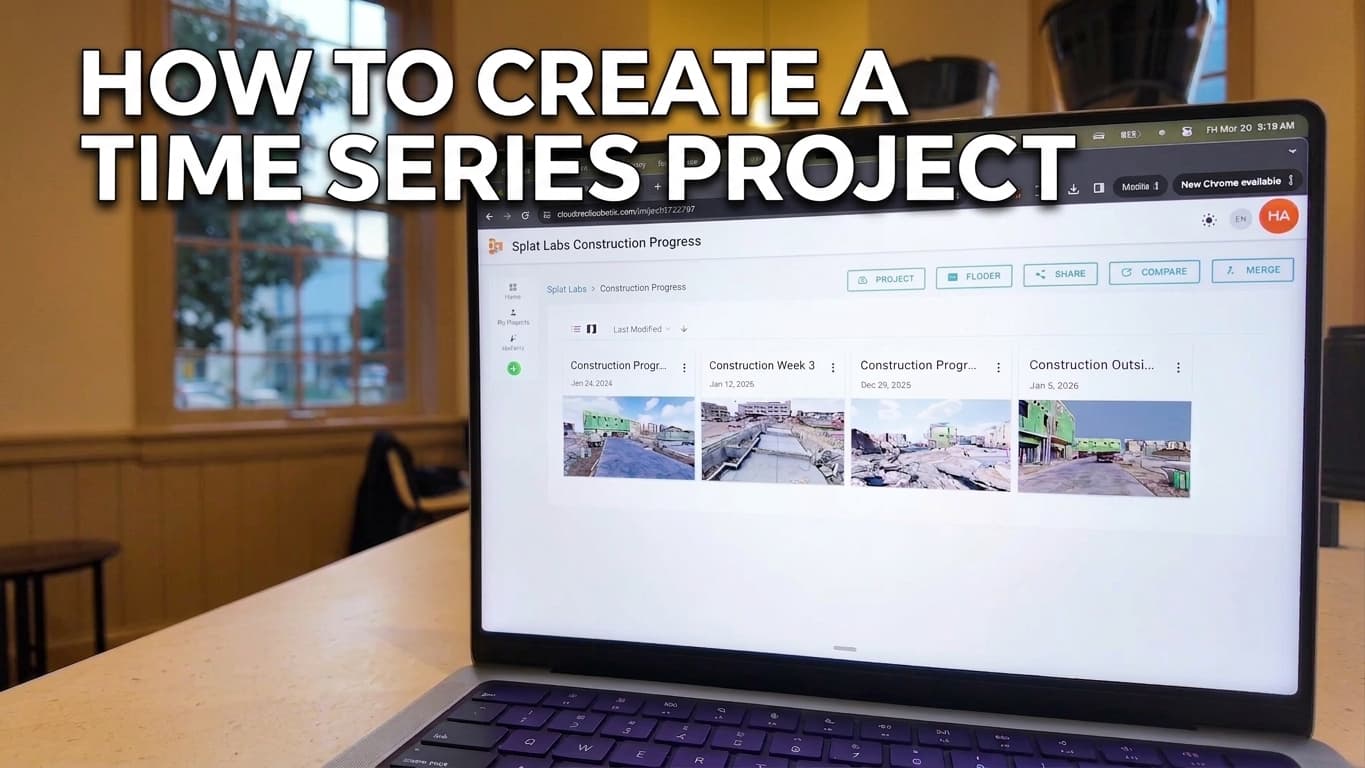
A clean workflow is to create a folder in Splat Labs and move related captures into it—week one, week two, exterior day two, and so on—so every phase you want to compare is easy to find before you open a base project.
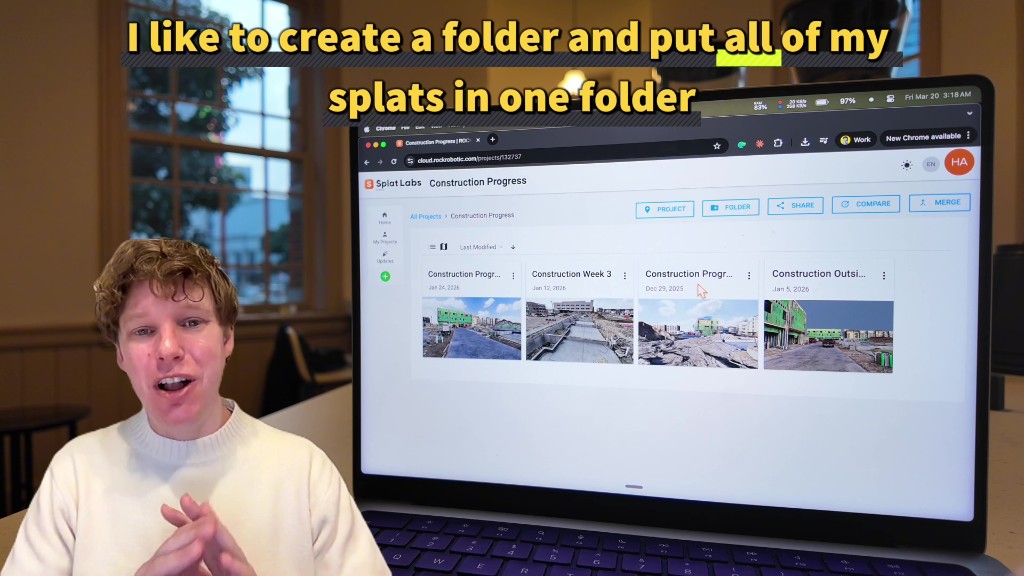 Keep time-series captures in one folder; open the project you want to use as the home base for linking.
Step 2: Open the Over Time panel
Inside your base project’s 3D viewer, look at the right-hand toolbar and click the Over Time icon (clock / history). The sidebar explains that you can link splats from different periods and calibrate them for seamless comparison.
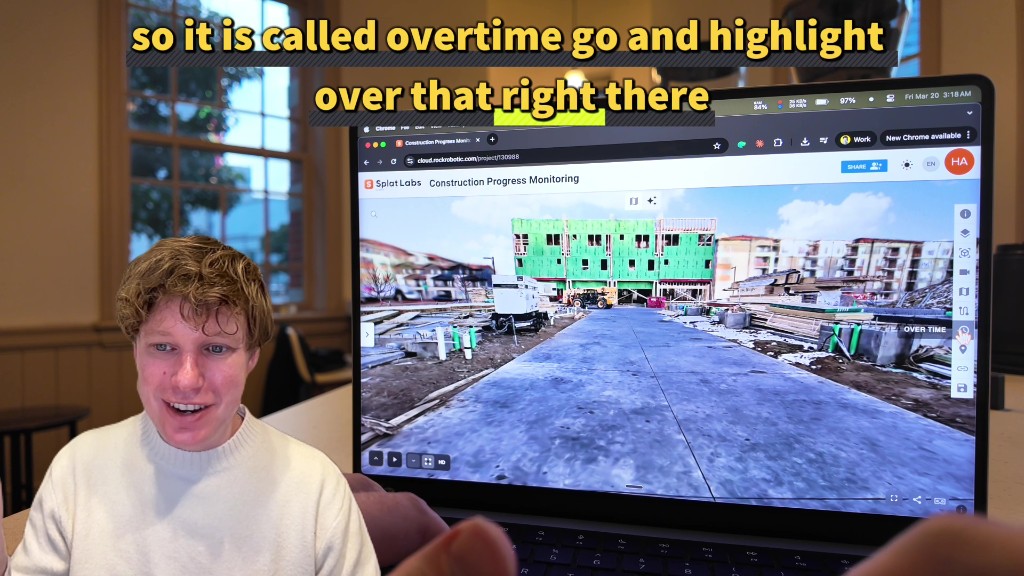 The Over Time tool opens the panel where you add and manage time-linked splats.
Step 3: Add a time-linked splat
Click + Add Time-Linked Splat. In the modal, search for another project, then use the dropdown to select the specific splat from that project. Repeat for as many time slices as you need—the video adds two for a short demo.
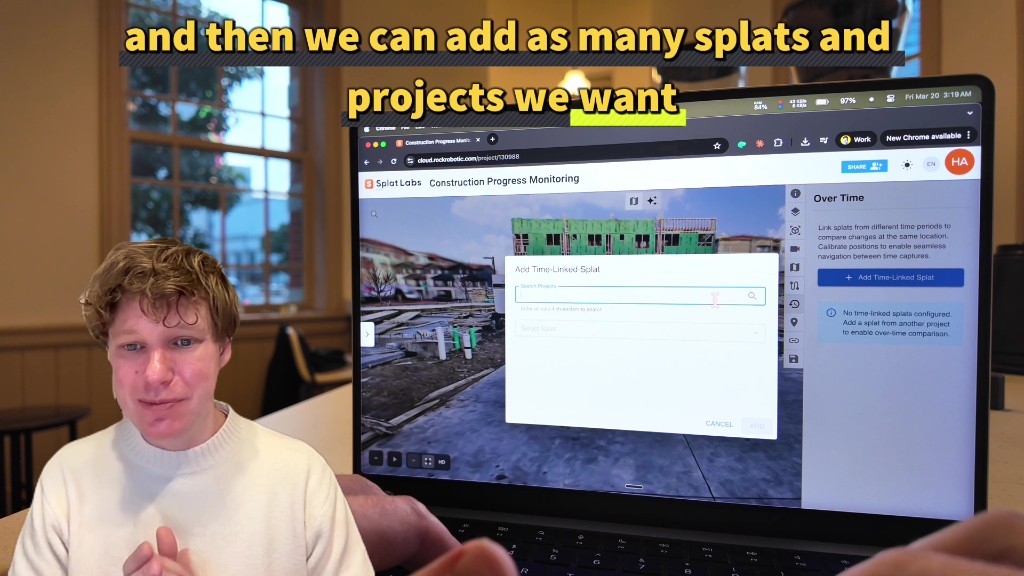 Link captures from other projects; each new entry appears in the Over Time list.
Step 4: Calibrate each linked splat
New links show a Needs Calibration state. Click the calibrate control for a linked splat to start alignment. Calibration is what makes “same camera, different week” feel correct; skip it and the scene will jump when you change dates.
![]() Needs Calibration means the transform between the base scene and that capture is not solved yet.
Needs Calibration means the transform between the base scene and that capture is not solved yet.
Step 5: Mark three matching points (base, then linked)
Walk to three distinct, permanent features you can recognize in both captures—corners, pads, utility boxes, anything that does not move between scans. The UI steps you through Point 1, Point 2, and Point 3 with Mark Point actions.
In the first splat, place all three markers. Then move to the linked splat and stand at the same real-world spots, marking each in order. The transcript suggests something like bottom-left, top-left, and right—wide triangles stabilize the solve.
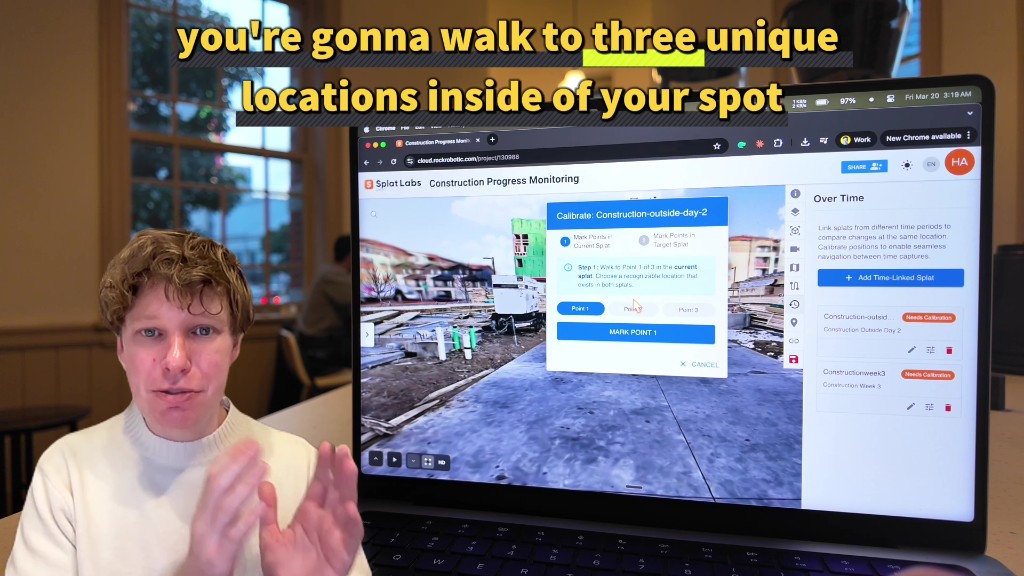 Three-point calibration locks the two captures into one coordinate story.
Step 6: Navigate the timeline from the bottom toolbar
When calibration is complete, use the Time navigation control on the lower-left viewer toolbar. Pick a dated capture—e.g. week two versus week one—and the viewer swaps splats while keeping you oriented. That is the moment progress clicks: same vantage, different week, visible deltas in framing, slab, or equipment.
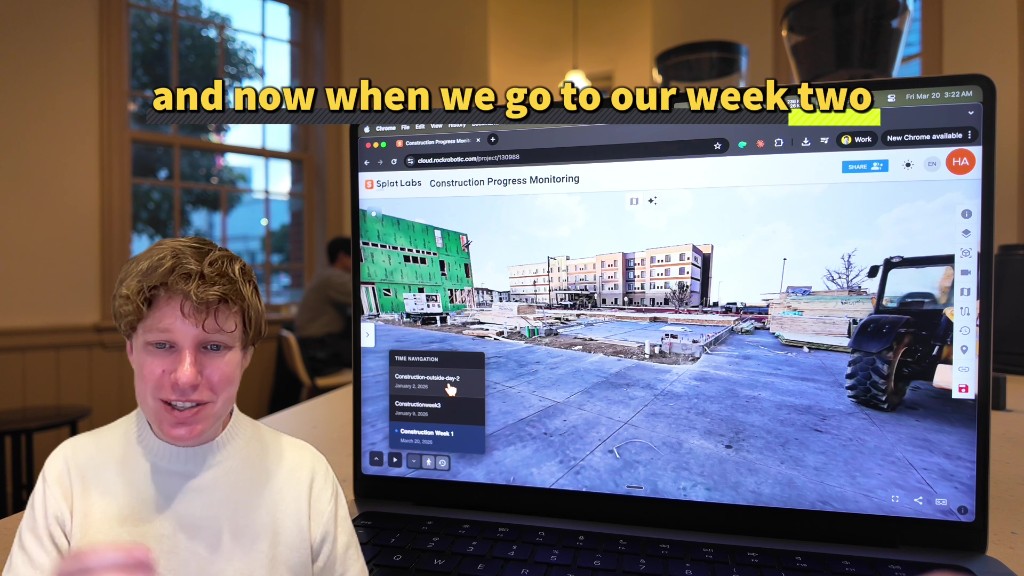 Open Time navigation to scrub your linked captures without losing your place in the scene.
Tips from the transcript
- Remember your three spots before you switch splats—you will revisit them in the second scene in the same order.
- After calibration, wander to an area you know changed and toggle dates; you should land in the same physical location with different conditions (for example framing up one week and open shell another).
- You can extend this to as many time-linked splats as you need, not just two.
Next steps
- Read 4D Timelines for requirements, FAQ, and accuracy tips.
- Explore a published example: Construction progress monitoring with multi-week 4D data.
Questions about team rollout or enterprise deployment? Reach out through the site—we are happy to help.