You have a Gaussian Splat file. You upload it to Splat Labs. And then — nothing. The scene is black, the model is somewhere off in space, and it is not oriented the way you need it.
This is completely normal. Most Gaussian Splats come out of processing with arbitrary orientation and position. The model might be sideways, upside down, or floating above the ground plane. Before you can share it, embed it, or walk through it, you need to place it where it belongs.
This tutorial walks through the entire process: uploading a splat, finding it in the viewer, using the translate, rotate, and scale controls to orient it on the grid, adding a ground plane so you can walk around, and saving your configuration so it loads correctly every time.
Watch the Full Tutorial
Full walkthrough: upload a Gaussian Splat, orient it with translate/rotate/scale, add a ground plane, and save.
Step 1: Create a Project and Upload Your Splat
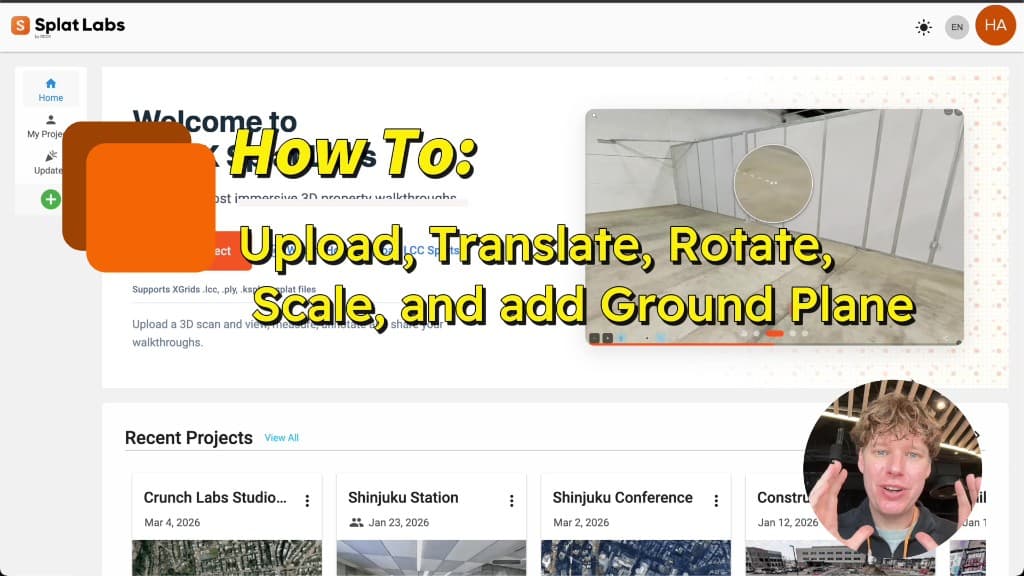
Start by logging in to Splat Labs Cloud. On the home dashboard, click Create Project in the left sidebar. A map appears where you can set a location — use the default or pick a specific one. Give your project a name and click Continue.
The Manage Data modal opens next. Drag and drop your splat file into the upload area. Splat Labs supports .ply, .splat, .ksplat, .lcc, and .lcc2 files from any source — PortalCam, Polycam, Luma AI, Postshot, Kiri Engine, XGRIDS, or any other tool that outputs standard Gaussian Splat formats. For XGRIDS .lcc or .lcc2 exports, drag in the entire export folder (not just the metadata file) so Splat Labs can pick up the scene, collision mesh, and thumbnail together.
Once the file uploads and processes, you land in the 3D viewer. At first, the screen may look empty or black. That is because the splat is likely positioned somewhere off-screen with its default orientation.
Step 2: Find Your Splat Using Orbit Control
Do not panic when you see a blank screen. Your splat is there — it is just not centered in the viewport.
Click the Orbit Control tool in the toolbar (the icon with circular arrows). This switches your navigation mode so you can spin around freely. Click and drag to orbit, and you will find your model floating somewhere in the scene.
Once you spot it, you are ready to start orienting it.
Step 3: Toggle the Grid
Before adjusting position and rotation, turn on the reference grid so you have a visual anchor.
Click the Edit Collisions icon in the right toolbar (the cube with a pen). Then click Toggle Grid. A grid appears in the scene representing the ground plane. This is the XYZ plane your model needs to sit on.
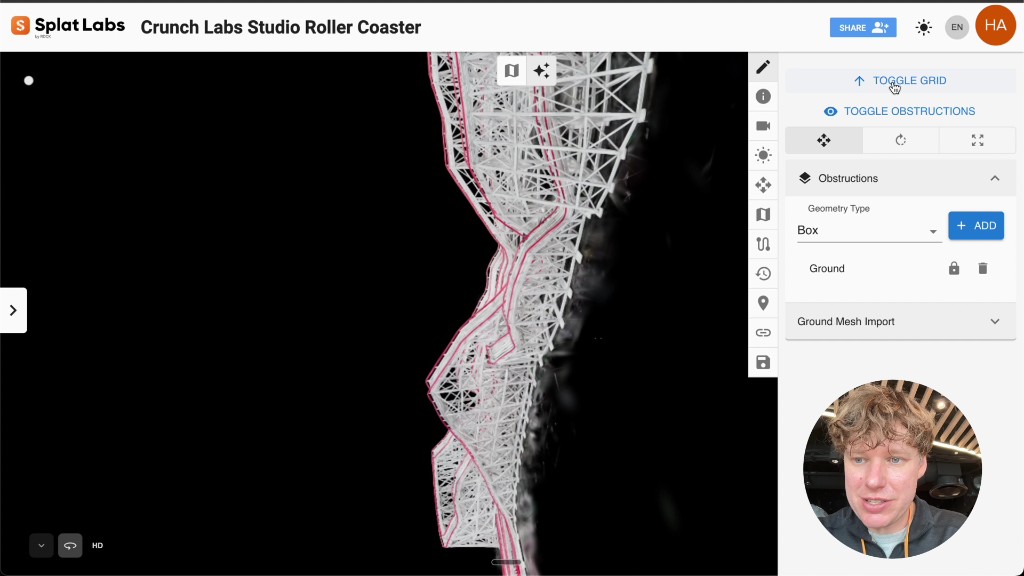 The Edit Collisions panel with Toggle Grid enabled. The grid squares are roughly 10 cm in real space.
Each square in the grid is roughly 10 centimeters in real space, giving you a sense of scale as you work.
Step 4: Adjust the Skybox for Visibility
If the background color makes it hard to see your model against the grid, change it.
Click the Skybox Settings icon in the right toolbar. Under Skybox Type, select Solid Color. Use the color picker to choose a contrasting background — white works well when you are positioning the model, and you can switch to black or another color later for the final presentation.
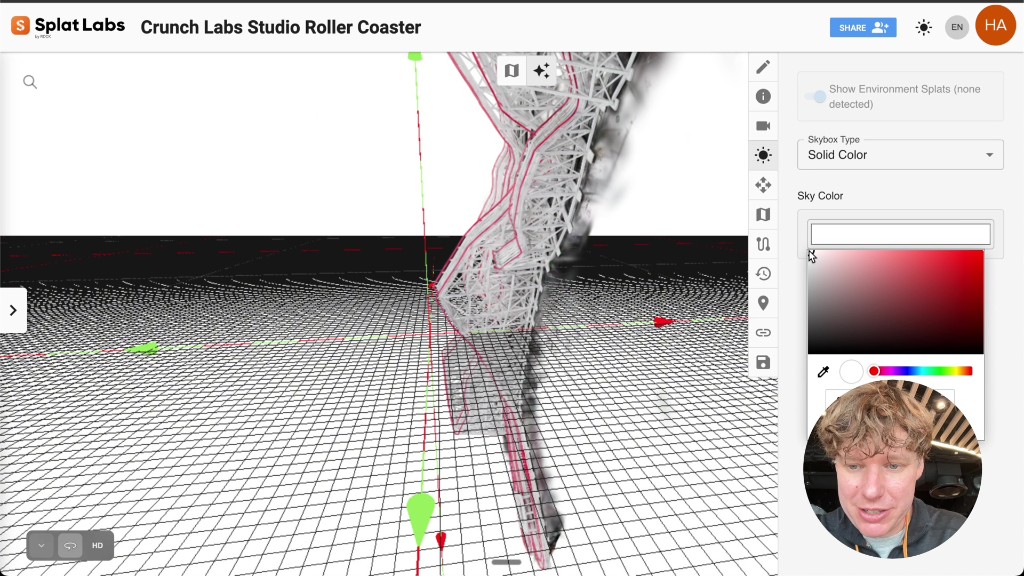 Setting the skybox to a solid white background for better visibility while adjusting the splat.
Step 5: Translate, Rotate, and Scale
This is the core of the process. Click the Splat Transform icon in the right toolbar (the cube with arrows). A panel opens with numerical fields for:
- Translation — X, Y, and Z axis position
- Rotation — X, Y, and Z axis rotation in degrees
- Scale — uniform scaling factor
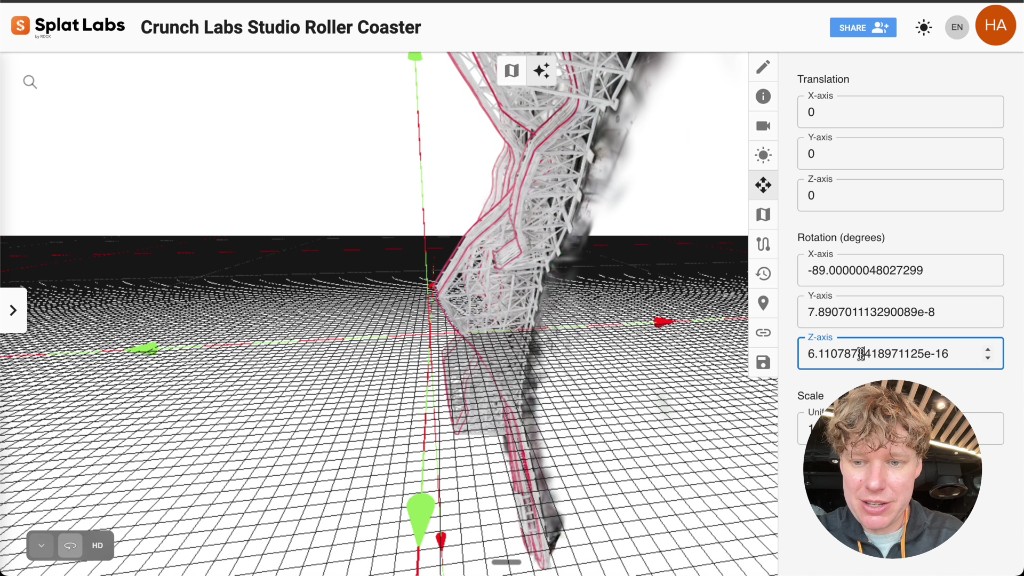 The Splat Transform panel. Click any numerical field and adjust the value to reposition, rotate, or resize your splat.
Click into any numerical field and adjust the value. A few tips that speed things up:
- Hold Command (Mac) or Ctrl (Windows) while scrolling over a field to change the value quickly.
- Start with rotation to get the model right-side up. Most splats from phone captures need a roughly -90 degree rotation on one axis to stand upright.
- Then use translation to center the model on the grid.
- Finally adjust scale if the model appears too large or too small relative to the grid squares.
Work iteratively — rotate a bit, orbit around to check, translate to center, check again. There is no wrong order, but getting the rotation right first usually saves the most time.
Once the model sits flat on the grid and looks correctly oriented, click Save. A confirmation modal appears — click Save again to confirm. Your transform settings are now stored with the project.
Step 6: Set the Background and Default View
With the model properly oriented, set up the presentation:
-
Toggle off the grid — Go back to Edit Collisions and click Toggle Grid to hide it. The ground plane collision data is preserved even when the grid is hidden, so you can still walk around on it.
-
Set the background color — Open Skybox Settings and pick your final background color. Black works well for most models, especially those captured outdoors or in dark environments.
-
Save the default starting position — Open the Splat Metadata tab (the info icon in the right toolbar). Click Save Current Position. This stores the current camera angle as the default view whenever someone opens the project or clicks "Reset View."
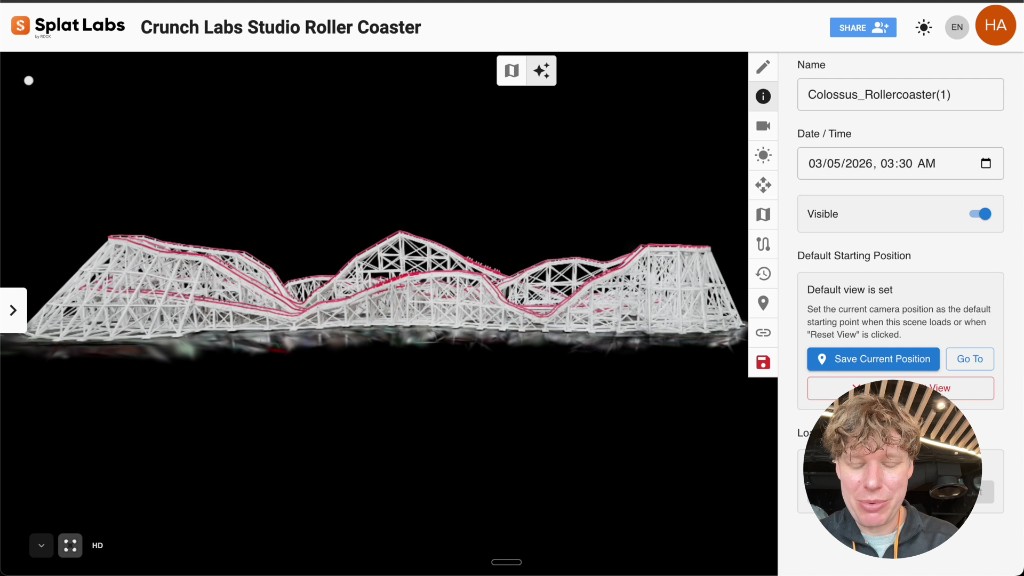 The Metadata panel. Click "Save Current Position" to set the default camera angle for anyone viewing this project.
- Capture a screenshot — Click the camera icon to take a screenshot from the current viewpoint. This becomes the project thumbnail on the dashboard and in shared links.
Click Save one final time to commit everything.
The Result
Go back to the home dashboard. Your project now shows the updated thumbnail. Open it, and the splat loads exactly where you placed it — oriented, scaled, and sitting on a walkable ground plane.
You can navigate in first-person mode and walk around the scene. The ground plane collision keeps you grounded, so you move through the space naturally instead of flying through it.
From here you can:
- Share the project — Send the viewer link to anyone. They see the same oriented view with the ground plane active.
- Embed it on a website — Use the iframe embed code from the Share dialog. Learn how to embed.
- Add annotations — Right-click anywhere to pin documents, videos, or notes to specific locations. Learn how to annotate.
Quick Reference
| Action | Where to Find It |
|---|---|
| Create a project | Left sidebar → Create Project |
| Upload a splat file | Manage Data modal → drag and drop |
| Orbit navigation | Toolbar → Orbit Control (circular arrows) |
| Toggle the grid | Right toolbar → Edit Collisions → Toggle Grid |
| Change background | Right toolbar → Skybox Settings → Solid Color |
| Translate / Rotate / Scale | Right toolbar → Splat Transform |
| Save transform | Splat Transform panel → Save button |
| Set default camera | Right toolbar → Metadata → Save Current Position |
| Capture thumbnail | Toolbar → Camera icon |
Supported File Formats
Splat Labs accepts Gaussian Splats from any processing pipeline:
- PLY — Standard point cloud format used by most Gaussian Splatting implementations
- SPLAT — Compact Gaussian Splat format
- KSPLAT — Compressed splat format
- LCC — LiDAR-compatible compressed format
- XGRIDS — XGRIDS format
Upload from PortalCam, Polycam, Luma AI, Postshot, Kiri Engine, XGRIDS, Nerfstudio, 3D Gaussian Splatting, or any other tool that exports to these formats.